It’s easy to learn how to change the blade on a table saw. But you do need to know what you’re doing to make sure you don’t hurt yourself. Take it from me: it’s better to know this before starting any job, even if it’s just a simple cut.
When table saw blades get dull from being used a lot, they need to be changed. You’ll also have to switch out the blades depending on what you’re cutting. When we first started out, We had to learn this the hard way. And trust us, it wasn’t a pretty sight.
Dado blades, rip blades, and cross-cut blades are the most popular types of blades for table saws. Even if you have the best table saw for the money and use it at home or in a small shop, this is the general way to change the blade.
How to Change a Table Saw Blade?: (10 Steps)

Step 1: Turn Off the Power Supply
- Turn off the saw and lock the blade in place.
- Pull the saw’s plug.
- Wait until the blade is totally still before taking it out.
This part is very important because mistakes can happen if you aren’t patient enough. Even when we tried to grab the slow-spinning blade, We got cut.
Step 2: Remove the Throat Plate and Blade Guard
If you’re not sure what to do next, check the saw’s instructions. If not, you can move on to the steps below:
- Between the blade and the table is a throat plate that needs to be taken off. Usually, it is attached to the saw by one or more screws that need to be released before it can be taken off.
- After taking it off, put the throat plate somewhere safe.
- If there is one, take out the riving knife.
- Unplug your saw and make sure it’s unplugged twice before you work on it.
When we were working on our saw while it was still plugged in, We got a small electric shock. Don’t just take my word for it; always make sure everything is unplugged.
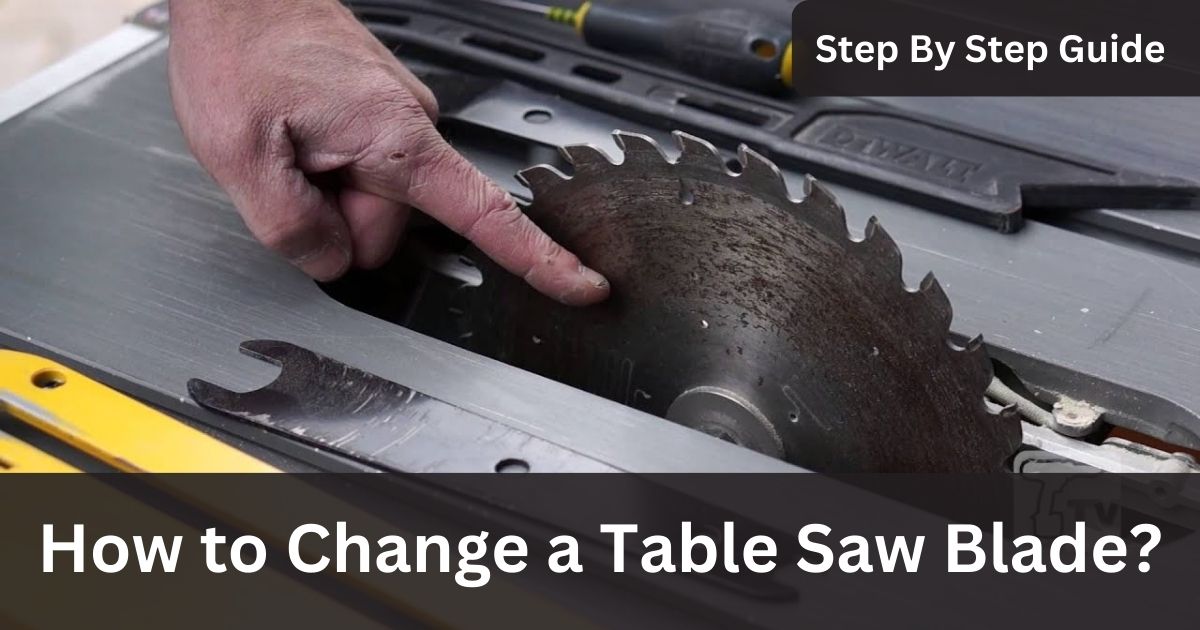
Step 3: Take the Saw Blade Off
The next step is to take the blade off of your table saw. To do this, you need to make sure the following things are true:
- Wear gloves and make sure none of your fingers are near the moving blade. Now, the blade is very sharp and could do a lot of damage.
- Use the right equipment. Don’t try to use your fingers or anything else that could easily be cut off by the blade. You should use something metal that is strong. You can use a tool or a type of crowbar called an L-shaped hex key.
Step 4: Loosen the Arbour Nut and Take it Off
The thread on the arbor nut is on the left. When you tighten it, the nut and bolt will turn in the opposite way.
Only one side of the table saws frame should be turned with the wrench. Do the following to open and remove an arbor nut:
- Set up your wrench so that you can use both hands to hold it well.
- Turn the wrench in the direction of the clock until it stops turning. This will also get rid of any dirt or grime in the area where you’re working.
- Put your wrench on top of the head of the arbor nut. This is the smaller piece with holes in it. Make sure not to touch any moving parts or other objects in the area, especially if they are sharp or hot.
- The best part of this part is when all the dirt and grime comes off. Then you can see how dirty even the parts you can’t see can be.
Step 5: Take the Blade Off
- First, turn off the power to your saw before you try to change the blade.
- To loosen the arbor nut, you’ll need to use force with a wrench or hammer. The wrench should be big enough that it won’t slip off the nut once it’s been tightened.
- If you can’t find a tool that fits over the nut and doesn’t slip around it, don’t worry about it. You can do the same thing with a screwdriver. Just be careful not to hurt yourself or any part of your table saw.
You can also use other tools, but you need to be careful. Even with thick gloves and protective clothes, don’t get too sure of yourself.
Step 6: Put the New Blade in Place
- Make sure the width of the new blade is the same as the old one.
- Make sure the direction of movement is the same.
- Check that the teeth on your new blade face forward the same way they did on your old blade. This will make sure that your new blade will cut well. For example, if you need to saw wood with a crosscut blade, make sure that all of its teeth are facing you.
- With a T-square jig, it’s best to have a long rip fence. This is done so that it is easy to line up the new blade with the line you are cutting and so that it will be easy to change blades in the future.
- Before you start up your table saw again, use an adjustable wrench to fix all the nuts and bolts around the arbor shaft. If not, it could start to break down later when the vibrations from moving machinery start to wear down parts that were not put together well.
You should now have a new blade with you. Make sure your blade is the right one for what you want to do.
Step 7: Put the Washer and Arbor Nut Back On
- Put the washer back on the arbor. Make sure it’s looking away from you and is lined up with the flat side of the nut.
- Then, stand in front of your table saw and grab the blade guard on both sides. It’s easy to cut yourself by mistake, so be careful.
- Next, reattach your arbor nut. You’ll want to make sure it’s threaded properly so that when you tighten it with another wrench later, it doesn’t damage the threads on your blade or arbor.
Step 8: Screw the Arbour Nut Down
- After you have turned on your blade, tighten the arbor nut. This is a very important step to make sure your blade doesn’t fall off when you use it.
- Put the blade on the top of the arbor and push it down hard.
- Make sure that every tooth is pointing down into the table saw.
- If they aren’t, take the blade off and turn it over so the teeth face down. Then press the blade back onto the arbor.
- Use an Allen wrench or a socket wrench to tighten the hand tight, but don’t do it too much at this point or it will break. You want there to be enough tension so that when you spin it by hand, it doesn’t move in any way other than around its axis. Even then, you only want a small change.
- If there’s too much pressure, you’ll feel like someone is pushing up on you from underneath as you spin. This means that too much force has been put on it at one point and that it needs to be “wedged” somewhere else along its length.
Wedging is something that most new woodworkers do from time to time. To get the right fit, my advice is to check the pressure on the arbor nut often and properly.
Step 9: Put the Throat Plate and the Blade Guard Gack in Place
- Check to see if the throat plate is in the right place.
- Make sure it’s the right size for your table saw and that it’s not broken or cracked.
If you see that it’s broken or cracked, you should have it fixed or thrown away.
Step 10: Check to See if it’s Safe
- Before you start, you need to make sure that your table saw works well and is safe to use.
- Check how tight the blades are. Be sure the blade is in place. If it’s loose or wobbling, fix it by turning the Allen wrench or screwdriver on one side of the blade toward you until it doesn’t move anymore.
- Check to see if there are any obstructions in the throat plate and make sure it is lined up correctly with your wood.
- Make sure that when they are cut together, there are no bumps or spaces between them.
How to Change a Blade on a Craftsman Table Saw:

A dull blade can do damage to the wood that can’t be fixed and also shorten the blade’s life. Craftsman table saws come with the tools you need to take the blade off and put it back on.
But don’t worry if you bought an old table saw or lost your tools. You can still easily take the blade off by doing the following. To change the blade, you’ll need safety gloves and a slot screwdriver, and it will take about an hour.
Step 1:
Pull the plug out of the hole and get the wire together. Make sure it’s not all over the floor. We don’t want you to get stuck in it and fall.
Step 2:
Turn the blade 90 degrees and loosen the blade-tilt locking knob or handle. Now tighten the locking knob again to keep the blade at a 90-degree angle.
Step 3:
Use the blade lever to move the blade to the highest cutting position. It will help get the blade open.
Step 4:
Take off the guard for the blade. A button on the top of a Craftsman table saw locks the blade guard in place. Most of the time, it is red. Put it in to get rid of the guard.
Step 5:
Use a screwdriver to take out the table piece. Just push it through the hole and pull it out. It will be easy to find.
Step 6:
Next, take off the blade arbor nut. Good for you if you have Craftsman wrenches. If that doesn’t work, you can also use your car key. When the nut is free, the outer flange washer and the blade can be taken out. Keep the arbor nut and washer safe, because things like this usually get lost at the end.
Step 7:
Sharpen the blade if you plan to use it again. Here is a full guide on how to sharpen blades.
Step 8:
Put the blade back into place. Put the washer on the arbor nut and tighten it. Make sure the arbor nut is tight. Use another wrench to hold the back of the nut. Put the table piece back in place and connect the blade guard. Move the blade to the height you want to cut at. All done. You’re finished.
How to Change Table Saw Blade Without Arbor Wrench:

Step 1: Turn Off Your Table Saw
Before you do any upkeep or repairs on your table saw, you should turn it off and unplug it. So make sure to do this before moving on to the next step.
Step 2: Take off the guard
After turning off and unplugging your table saw, you’ll need to release the blade guard from the front and back of your table saw in order to take it off. Depending on your type, you might need a screwdriver or another tool to take this off.
Step 3: Loosen the Arbor Nut and Take the Blade Off
Next, loosen the arbor nut in the middle of your table saw’s blade. Depending on your type, you can do this with a wrench or some other tool. Once the arbor nut is loose, carefully pull the blade out and off the table saw, being careful not to hit any sharp points.
Step 4: Put the New Blade in Place
Once the old blade is out of the way, you can put in a new one by sliding it into the place where the old one was. Make sure that the hole for the arbor on your new blade lines up with the threads on the arbor nut. Then, use your wrench to tighten the blade into place.
Step 5: Put the Blade Guard Back on Your Table Saw and Turn It On
Once your new table saw blade is safely in place, you can reattach the blade guard by sliding it back into place on both the front and back of your table saw. Once this is done, you can test your table saw to make sure the blade is working right by turning it on.
Step 6: Check Again
Lastly, before you start using your table saw again, you should check to make sure that all of the parts are still in place and working well. This will help make sure that you can use your table saw safely for all of your future craft and DIY projects.
Bottom Line: How to Change a table Saw Blade
Once you know how to change a table saw blade the right way, you’ll see that it’s not that hard after all. Even if you only use your table saw at home or in a small shop, you’ll still need to learn how to change the blades. This is a simple but useful skill.
Most jobs will require you to change your blades more than once, and if you know how to do it yourself, you will save a lot of time. Now that you know how to change a table saw blade, you can feel good about moving forward with your woodworking projects.
FAQs: about How to Change a Table Saw Blade
How to Change the Blade on a Ryobi Table Saw?
To change the blade on a Ryobi table saw, first remove the blade by pressing down on the release button and pulling it out. Then, cut off the old blade with a sharp knife.
How Do You Take Nuts Apart?
Penetrating oil, also known as CRC, should be the first thing you try to open a nut, bolt, or screw. Spray the bolt or screw with oil and let it sit for 10 to 15 minutes to let the oil get into the threads. Then, loosen the fastener with a wrench or tool.
Related Posts:
- How Do Table Saws Detect Fingers
- What Is a Trunnion On a Table Saw?
- Can you Cut Aluminum with a Table Saw
- Best Table Saw Blades Reviewed (Top 10 Picks in 2023)
- How to Cut a 60 Degree Angle on a Table Saw
- How To Cut More than 45 Degrees on a Table Saw
- Best Table Saw Blades Reviewed (Top 10 Picks in 2023)
- How To Sharpen Table Saw Blades