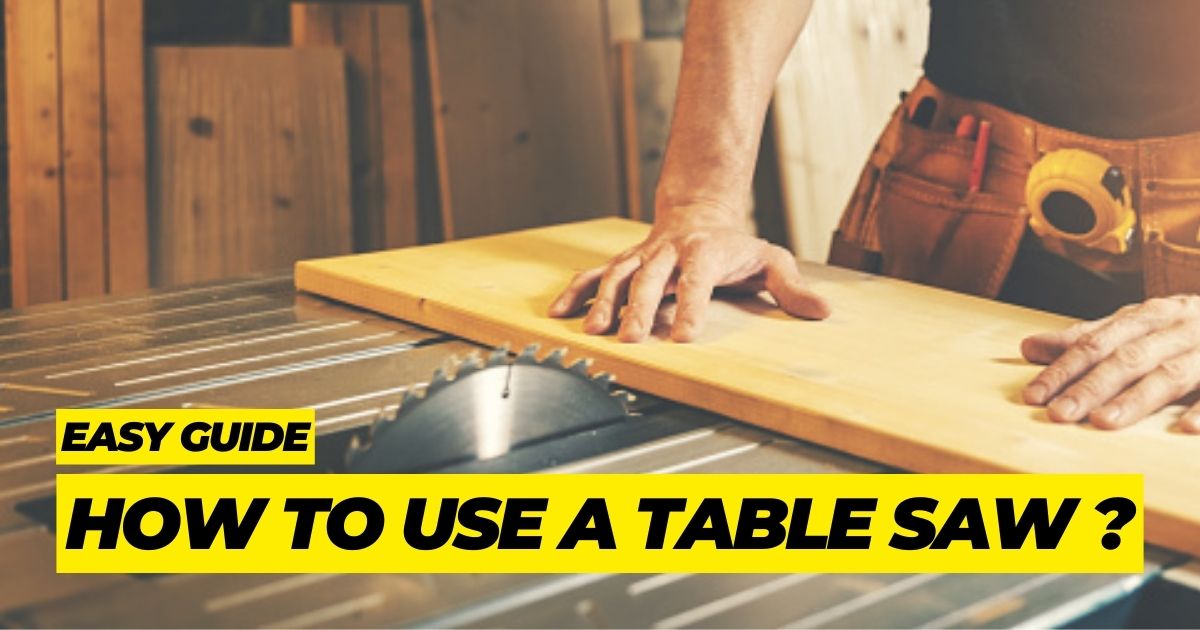
Most woodworkers call the table saw the “king of saws” because it can be used for many different things and is so easy to use. However, it still needs a precise handle to get the most out of it.
And if you’re learning, it’s important to figure out how to handle, control, and use your table saw. When learning how to use a table saw for beginners you’ll need to get used to the basic controls, which are the same for almost all models, even if they are in different places. Also, it will help if you know what each part of the table saw does.
So, if you want to learn how to use a table saw for beginners, this article is the best place to start. Sit back, relax, and keep reading to find out how we think table saws should be used.
1)Safety First:
First of all, table saws are dangerous pieces of power tools. If you aren’t careful, they can and will hurt you very badly. Always wear safety glasses, pay attention to what you’re doing, and never lose respect for this powerful machine. Don’t be afraid to use the tool, but remember that if you’re not careful, it can and will cut off fingers or eyes. You won’t get careless if you have a healthy amount of nerves and think about things.
2)Familiarize Yourself with Every Part:

The table saw is an instrument with a lot of parts. This is something that some of the best table saws for small shops have. To safely and effectively use your table saw, you must know what each part does.
The part of the saw that does the cutting is the blade. It has two or more blades made of steel or carbide that spin quickly when the starter rope is pulled.a
It has a guard that keeps people from getting hurt by flying pieces of wood while it is being used. This guard is attached to the front end plate, which is where you put the wood you want to cut before using your table saw.
The miter gauge helps you make precise cuts for crown molding or picture frames, even with their odd shapes. The miter gauge is what makes it possible for these pieces to fit together perfectly when they are put together to make a whole.
3)Inspect the Alignment of the Saw Before each Use:
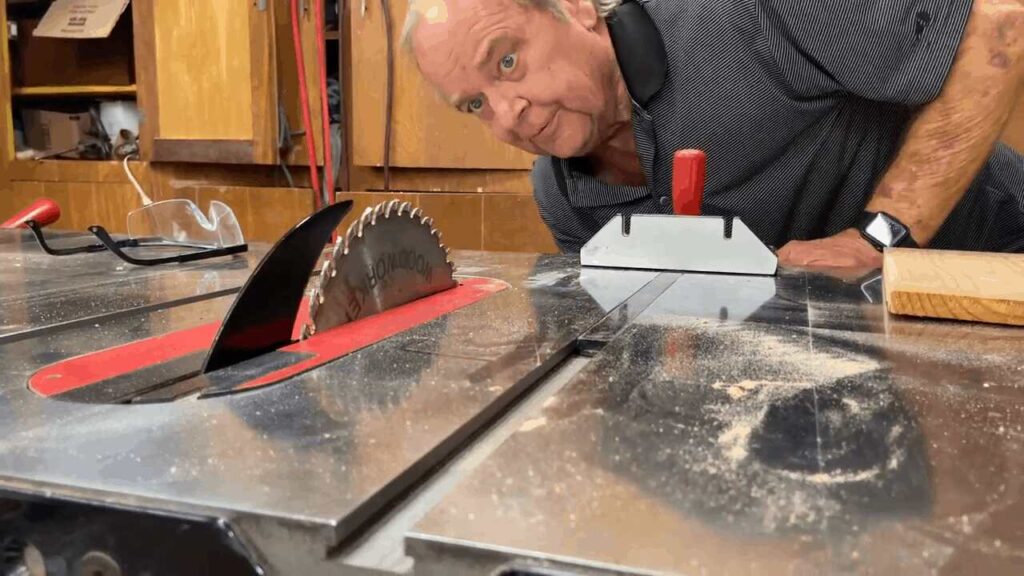
Check to see if the saw is at a right angle to the surface you are working on. A square is a metal tool with a 90-degree mark on one end. It can be used to make sure that all of the sides of the blade and table are at 90-degree angles to each other.
You should check the height of your blade to make sure it’s set right. When fully raised or lowered, it should be at least 1/32″ above your workpiece. This should be a part of even the best table saw for a beginner woodworker.
Turn on the saw and move it up or down until you can see the light through any part of the piece of wood. Then, measure how high the piece of wood is from the tabletop. This will depend on the thickness of your piece.
If necessary, turn it counterclockwise until there is no space between the table surface and the edge of the blade when it is fully raised or lowered.
The fence must also line up with both sides of the blade. If it doesn’t, this can lead to problems in the future. Use clamps to hold down both sides of the fence so that they are right up against each other, and then tighten the screws so that neither side moves.
4)Cuts and Their Varieties:
A table saw can make three different kinds of cuts: a cross-cut, a ripping cut, and a dado cut.
Most of the time, a cross cut is a cut that goes across the grain, but it can be any cut that goes across the board in a narrower direction. Either the miter gauge or the sled can be used to make a crosscut.
A ripping cut is a cut that goes from one end of the board to the other. It is done by setting the fence to the width you want to get.
Most of the time, a dado cut is a wide cut or trench that is used in jointing. You can do it with the miter gauge or the fence, but special blades will do it faster and more accurately.
5)Adjusting Blade Height:
There are two ways to decide how high the blade should be. The first is to set the blade only slightly higher (~1/8 inch) than the top of the material that needs to be cut. This is done for safety since if you fall, you’ll probably only get a cut that deep.
This setup can cause slightly more tear out on the bottom of the board and could slightly increase the chance of kickback as the teeth are encountering the wood at more of a horizontal instead of a vertical angle. This is the method we suggest for everyone unless you specifically need to prevent a tear-out.
The second school of thought is to set the blade height well above the top of the material to be cut. This can slightly reduce the fraying and tear out on the bottom of the workpiece but is more dangerous. If you slip, you will expose a lot more of the blade and do a lot more damage. If you follow good procedure this can still be done safely, but pay attention and use the other method if possible.
6)Cuts at Angles:
Two kinds of angled cuts can be made with a table saw. The first is done by setting the miter gauge in relation to the plane of the blade. To make this cut, set the desired angle on the miter gauge and cut as you would for any other cross-cut.
The second angle is measured in relation to the table’s surface. This is done by putting the blade on its side. The wheel to change the angle of the blade is on the side of the machine. Behind the wheel to change the height of the blade is a reference point.
Take note that the markings on the miter gauge and the front of the machine are more for precise carpentry. If you need a more precise angle, you should use a protractor and a bevel gauge to check the angle right on the blade.
7)Fence Adjustment:
Setting up the fence takes a bit more work. The fence is used to cut pieces of wood straight along their length. The dog or lever at the front of the fence is used to move it. To change the width of your cut, lift the lever, and the fence will move left and right. Raise the saw’s blade just a little bit so you can measure it.
Arch reactors have a fence with a strange feature: if the lever is up, the fence can get very out of shape with respect to the blade. Just lowering the lever helps a little, so put the fence roughly where you want it and lower the lever, but don’t push it down hard.
This will make most of the fence’s angle disappear. Another thing that many table saws have in common is that the fence doesn’t stay perfectly square to the blade. The best way to fix this is to measure from the fence to both the front and back of the blade to make sure they are the same.
If the readings aren’t the same, lightly tap the front or back of the fence with your knuckles until both measurements show the width you want.
After both measurements show the width you want, put one hand on top of the fence to hold it in place and tighten the lever with the other hand.
8)Alternating the Blades and Inserts:
To remove or change the inserts, just lift on the front using the hole or push down on the back to rock the front up. The back of the insert has a tab that goes under the table.
Most tables saw blades are 8 to 10 inches in diameter and 1/8 of an inch wide. The better ones have carbide welded onto the tips of the teeth to keep them sharper for longer. Sharp blows or hitting metal can break these teeth off. The blade will last longer if you check the wood for metal, don’t force it into the blade quickly, and don’t drop it on a hard surface. A few missing carbide teeth won’t change the way it cuts or how safe it is to use, but if you see a lot of them missing, you should say something. You will cut wood and plastic with these standard saw blades 95% of the time.
Next, we have two kinds of dado blades: one that wobbles and one that can be stacked. With a dado blade, you can cut notches or trenches in your material that are straight and smooth.
A slanted blade is used to make the wobble blade work. You can change the width of the wobble blade by loosening the two screws on the face plate and turning the two wedge plates until the mark lines up with the width you want.
The second type is dado blades that can be stacked. These are put together on the arbor until they reach the width you want. When putting it together, the traditional saw blades go on the outside and the two-tooth blades go in the middle. You must put a shim between each blade, and the shims between the regular blades and the inner blades are marked to show that they are thicker.
To change the blades, raise the height of the blades to make it easier and take out the insert. Then, take a piece of old wood and put it against the blade’s teeth. With a wrench, turn the arbor nut toward you to loosen it. The teeth should bite into the scrap wood and stop the blade from spinning.
Remove the nut and the current blade, but don’t drop the nut into the sawdust bin. This will save you a lot of trouble. Put the new blade and nut back on the arbor and tighten them by hand until they fit snugly. Make sure it fits well, but don’t try to tighten it too much. The saw is made so that the first time you turn it on, the speed of the blade will tighten it. Change the cover for the right insert.
9)Making the Cuts:
To make a cross-cut, you must first measure and mark your board with the right tool. Don’t use the fence and the miter gauge/sled at the same time. This is dangerous and will make things stick together. Always use a measuring tool to set the length to be cut, and then line up the mark by eye. Set the height of the blade and line up the mark with the right side of the blade.
Table saw blades usually have a 1/8th kerf, so take this into account. Start the saw and hold the workpiece firmly in place on the miter gauge or sled. Move the wood through and past the blade slowly and without jerking. Turn off the machine, but watch out that your head doesn’t get in the way of any of the loose stuff around the blade as you do so. There is a small chance that the blade could pick up one of these and kick it back at you.
To make a ripping cut, adjust the height of the fence and the blade as explained above. Put the board against the fence and turn on the machine. Use only as much force as you need to keep the board against the fence. If you push too hard against the fence, you won’t cut it straight, which can be dangerous.
When too much force is put on the fence, it can become spring-loaded. When the pressure is taken off, the spring will push the wood back into the blade, which will likely pick it up and kick it back at you at high speed. Move the wood through and past the blade slowly and without jerking. Take the scrap wood out in a safe way or turn the machine off as described above.
10)Maintenance:
On the table saw, members will be required to do relatively little general maintenance. Before beginning, it is a good practice to inspect the rear drive belt for wear and the blade’s teeth for chipping. Degradation on the belt or a few missing carbide teeth on the blade does not render the saw hazardous, but these components may require replacement shortly.
Numerous missing teeth will become a safety concern. As always, the final step is cleaning. Vacuum or sweep any sawdust from the table’s surface, and check the sawdust collection bucket in the back to ensure it is not overflowing.
How to Use a Table Saw (Step By Step): Video Guide
Bottom Line: How to Use a Table Saw
The table saw is our favorite home and shop tool because anyone can learn to use it safely and effectively.
Even if you have one of the best table saws for woodworking, you don’t need to know how to use it like a pro, but you do need to be careful and watchful. The table saw is not a hard tool to use. All you need are a few safety tips and some practice to use it safely on your next project.
All you have to do when using power tools like a table saw is make sure your eyes and hands are safe.
FAQs about How to Use a Table Saw
What’s the Most Important Thing to Remember When Using a Table Saw?
Don’t stand right behind the blade. Keep your fingers and hands out of the plane where the saw blade is while you are cutting. When changing hands, you should first pick them up and bring them close to you.
What is a Table Saw’s Main Use?
Table saws are versatile tools that can be used to cut both across and with the grain of wood. Most of the time, they are used to rip. After setting the height and angle of the blade, the operator pushes the stock into the blade to make the cut.
How to Use a Table Saw Safely?
Stand to one side of the saw blade when cutting; do not allow others to stand in direct line with the saw blade while the saw is operating. Use the blade guard that comes with the saw. Never reach over the saw blade to remove or hold down the piece of wood. Always use a push stick when ripping wood on your saw.
Meta Description:
- Best Table Saw Under 1000
- How Many Amps Does a Table Saw Use?
- 10 Best Table Saw For Beginners: (Top Picks & Reviews)
- What is a Hybrid Table Saw?
- Top 11 Best Table Saw Under 500 Dollars
- Best Hybrid Table Saw Under $1000
- Can You Cut Plexiglass With a Table Saw?
- How To Sharpen Table Saw Blades
- How to Extend Rip Capacity of Table Saw?
- Can You Cut PVC With a Table Saw?
- Can You Cut Acrylic With A Table Saw?