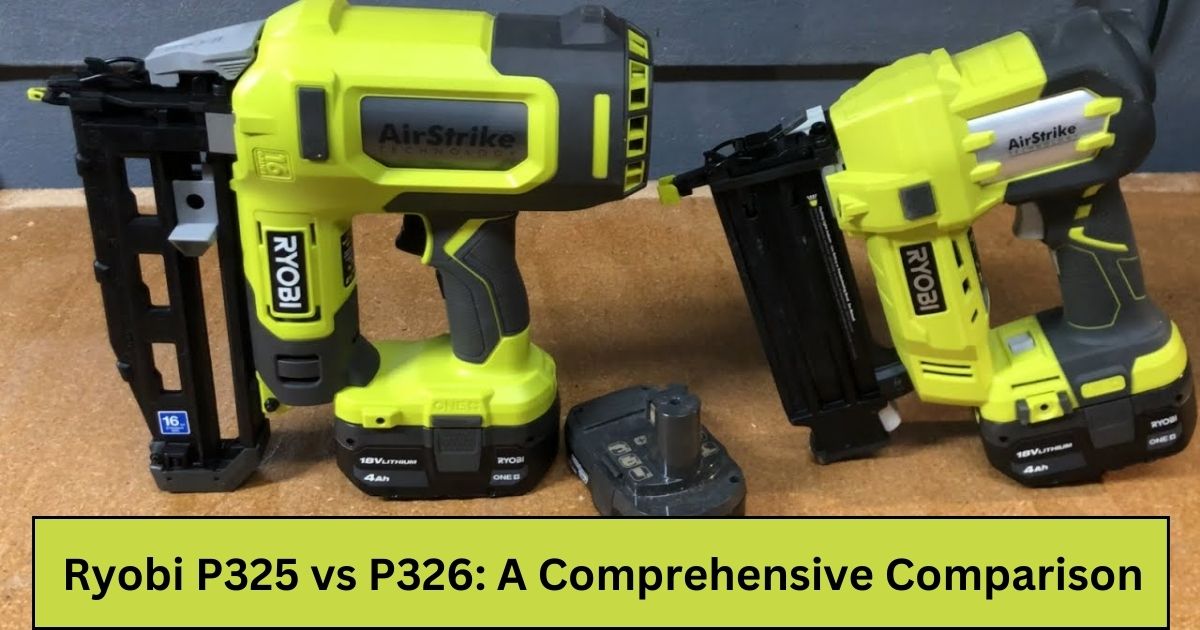
Ryobi’s 18V ONE+ line includes two impressive finish nailers, namely the P325 and P326. They excel in handling both small DIY projects and professional tasks with equal proficiency.
When comparing the Ryobi P325 vs P326, you’ll notice that the P326 sets itself apart with only a few modifications. Although there aren’t many glaring disparities between them, there are subtle distinctions that could influence your choice between the two.
Let’s dive right in and explore the features that differentiate these two nailers from each other!
Read More: Craftsman vs Ryobi Table Saw
Ryobi P325 vs P326: Unveiling the Key Differences Between Two Powerful Tools

Mode: Ryobi P325 vs P326
The P325 and P326 have some differences in their trigger modes. The P325 comes with two modes: single fire and bump fire. In contrast, the P326 offers only the single fire mode.
The absence of the bump fire mode in the P326 is reasonable since it’s primarily marketed as a finish nailer. Consequently, a bump fire mode isn’t even necessary for its intended use. The P326 is designed for precise and controlled finishing work, and its single-fire mode suits this purpose well.
Despite this, we must acknowledge the P325’s versatility as a significant advantage. It provides both modes, allowing you to achieve meticulous finishing work with the single fire mode while also facilitating swift nailing and framing tasks with the bump fire mode.
The presence of these two modes in the P325 expands its functionality, making it suitable for a broader range of tasks. With the single fire mode, you can achieve pinpoint accuracy, ensuring your finished work is flawless.
Meanwhile, the bump fire mode comes in handy when speed is of the essence, such as in larger projects where efficiency is crucial.
This additional flexibility is a definite advantage, as it means you don’t need to invest in multiple nailers for different tasks. The P325 can handle both precise finish work and rapid nailing, making it a more versatile choice for those who require a single tool to tackle a variety of projects.
In summary, while the P326 is specialized for finish work with its single fire mode, the P325’s ability to switch between single fire and bump fire modes makes it a more versatile and practical option for a wider array of nailing needs.
Cost: Ryobi p326 vs p325
In all fairness, we have reservations about the value of the P326, mainly because it’s missing the bump fire trigger. On the other hand, the P325 provides both single fire and bump fire modes, and the price difference is less than $20.
Considering that everything, from the airstrike technology to the magazine capacity and overall efficiency, remains identical in both the P325 and P326, we strongly recommend opting for the P325.
To put it simply, the P325 offers better bang for your buck. It’s the more practical choice due to its versatile trigger options, which can save you time and effort on various projects.
Given that there’s little to no difference in the other crucial features, the P325 stands out as the more cost-effective and efficient option.
You can check the price of Ryobi P325 and P326 below.
Ryobi P325 Review:

Ryobi P326 Review:

Style: Ryobi P325 vs P326
The most recent Ryobi P326 shows a few alterations in its design, but these changes won’t significantly transform the user experience.
One noteworthy improvement is the slimmer tip of the P326, which enhances precision and allows for more accurate operation, even in those tricky, hard-to-reach spaces.
Additionally, the P326 features a different-sized air pressure adjustment at the back, and Ryobi has made some minor adjustments to the depth gauge dial in this latest version. However, it’s important to note that these design modifications don’t directly impact the tool’s efficiency or performance.
In essence, these design tweaks in the P326 are aimed at refining the user experience, making it more precise and adaptable to various working conditions.
While they may not revolutionize the tool’s efficiency, they do contribute to improved precision and ease of use, particularly when dealing with intricate or tight spaces.
Weight: Ryobi P325 vs P326
The Ryobi P325 comes in at approximately 7.59 pounds, while the P326 is lighter, weighing around 7 pounds.
With the inclusion of batteries, you can expect the weight to increase by a pound or perhaps a half-pound. Nonetheless, both these nailers are well-crafted, boasting a balanced and ergonomic design that makes using them feel like a walk in the park.
In any case, it’s worth noting that the Ryobi P326 is a tad lighter than the P325, which certainly stands as a positive attribute. However, this doesn’t diminish the P325’s qualities in any way.
To put it simply, the P326’s lighter weight is a notable advantage, as it can potentially reduce fatigue during extended use. Yet, it’s essential to acknowledge that the P325 remains a highly capable tool, and its slightly greater weight doesn’t significantly detract from its overall performance.
Both nailers are designed for comfortable and efficient use, and the slight variation in weight should not overshadow their respective merits.
Shots on a Single Battery Cycle:
The P325 can shoot up to 800 times on a single charge, whereas the P326 boasts a higher capacity of approximately 1000 shots per charge. It’s important to note that the number of shots you can get may vary based on the battery’s capacity. The figures mentioned here are applicable when using 18V 4Ah batteries.
In any case, this level of performance is truly remarkable because it means you can work tirelessly throughout the day without the need to frequently recharge your tool or swap out batteries, especially during those demanding work sessions.
The ability to fire 800 to 1000 shots on a single charge demonstrates the efficiency and longevity of these nailing tools. It minimizes interruptions in your workflow, allowing you to stay focused on your tasks without constant breaks for battery changes or recharging.
This extended usage time is a significant benefit, enhancing productivity and making these tools highly suitable for professional and heavy-duty applications.
Magazine Capacity: Ryobi P325 vs P326
The primary disparity between the Ryobi P325 and P326 revolves around their magazine capacities. Let’s delve into this difference in more detail.
Firstly, the Ryobi P325, in the 18V ONE+ line, boasts a magazine that can hold up to a whopping 105 nails. This substantial capacity allows you to work for more extended periods without the need for frequent reloads.
It’s like having a well-stocked toolbox right at your fingertips, reducing downtime and increasing efficiency on your projects.
On the other hand, the Ryobi P326 presents a more conservative magazine capacity, accommodating up to 16 gauge straight finish nails.
While it’s certainly suitable for various nailing tasks, this smaller magazine means you’ll need to reload more frequently, which can be a bit of a disruption when working on larger or more time-intensive projects.
In essence, the P325’s superior magazine capacity grants it an edge in terms of productivity and convenience. It’s particularly advantageous for tasks that demand prolonged nailing without interruptions.
Conversely, the P326’s smaller magazine, although suitable for its intended finish work, may require more frequent reloading, which could be less ideal for extensive projects.
Therefore, the choice between these two nailers may largely hinge on the specific nature and scale of your tasks.
Finish Nail Size: Ryobi P325 vs P326
The primary difference between Ryobi P325 and P326 lies in the maximum finish nail length they can accommodate. Let’s simplify this for better understanding.
The Ryobi P325, in the 18V ONE+ line, can handle finish nails up to 2 inches in length. This makes it suitable for a wide range of finishing tasks, such as attaching trim, baseboards, or crown molding.
On the other hand, the Ryobi P326, although quite similar to the P325, is designed for slightly shorter finish nails. It can accept finish nails with a maximum length of 1-1/4 inches.
In essence, the key distinction here is that the P325 can accommodate longer finish nails compared to the P326. This can be beneficial when working on projects that require longer nails for secure fastening or when dealing with thicker materials.
The P326, with its shorter nail capacity, is still excellent for various finishing jobs but may not be as versatile when longer nails are necessary.
Therefore, your choice between the P325 and P326 may hinge on the specific finish nail lengths your projects require, with the P325 being the better choice for longer nails and the P326 being well-suited for shorter finish nails.
Power Supply: Ryobi P326 vs P325
The main contrast between the Ryobi P325 and P326 revolves around their power sources. To facilitate comprehension, let’s simplify it.k it down.
The Ryobi P325 is powered by the 18V ONE+ battery system, which is a part of Ryobi’s lineup of cordless power tools. This means it operates on rechargeable 18-volt lithium-ion batteries that provide the necessary energy to drive the nailer. It’s a cordless and portable solution, giving you the freedom to work without being tethered to a power outlet.
In contrast, the Ryobi P326 also uses the 18V ONE+ battery system. However, there’s a significant difference in the power source. The P326 is known as a hybrid finish nailer, which means it can be powered either by the 18V ONE+ batteries like the P325 or by using an AC power cord, plugging it directly into an electrical outlet.
This dual power source capability offers versatility, allowing you to work with batteries when on the go and switch to corded power when a continuous power source is readily available.
In essence, the key distinction lies in the power source flexibility. The P325 operates solely on batteries, providing cordless freedom, while the P326 offers the option to use either batteries or plug into an electrical outlet, giving you more adaptability in various work scenarios.
Your choice between these two may depend on your specific power needs and whether you prefer cordless mobility or the reliability of corded power.
Bottom Line: Ryobi p325 vs p326
The P325 clearly stands out compared to the P326, primarily because it offers a variety of trigger modes, including both single fire and bump fire modes. Surprisingly, the P326, despite being pricier, lacks this dual-mode advantages. Apart from this, both nailers are exceptionally user-friendly, featuring hassle-free nail loading, easy depth adjustments, and straightforward jam-clearing procedures.
In sum, the decision here is quite straightforward. The P325’s versatility in trigger modes makes it a more attractive choice, as it can adapt to different project needs.
Whether you require precise, single shots for delicate finishing work or rapid firing for larger tasks, the P325 has you covered. The P326, while competent, misses out on this crucial dual-mode feature, which may limit its suitability for a broader range of tasks.
When ease of use and versatility are key considerations, the P325 emerges as the more well-rounded option.
FAQs
Is An Electric or Air Nail Gun the Better Choice?
Cordless nail guns are handy for folks who need to move around, while corded nail guns give a steady power source on job sites where there’s an air compressor available. But there are certain tasks where compressor-powered pneumatic nail guns are still the preferred option.
What are the Drawbacks of a Nail Gun?
The most frequent injuries involve punctures to the hands and fingers, but more severe harm and even fatalities can happen when using nail guns. All nail guns have the potential to cause significant harm. When using a nail gun with a bump or automatic trigger (also known as a contact trip trigger), it can lead to nails firing unintentionally.
What Makes Nail Guns not Work Anymore?
Jams are the top reason for a nailer not firing. The good news is, they’re usually simple to fix. To be safe, start by disconnecting the tool from the air supply, pulling back the feeder part, and taking out any extra fasteners from the magazine. After that, how you clear the jam depends on the type of nailer you’re using.
Related Posts:
- Radial Arm Saw vs Table Saw: Which is Better in 2024?
- 24 vs 40 Tooth Saw Blade: [Which One is Better?]
- Arbor Saw vs Table Saw
- Craftsman vs Ryobi Table Saw
- Delta vs Dewalt Table Saw: (Which One is Better)
- Table Saw vs Track Saw: (4 Main Keys Difference)
- Bosch vs Dewalt Table Saw: Which One is Better?
- Table Saw vs Band Saw: Which One Is Better?
- Cabinet Saw vs Table Saw